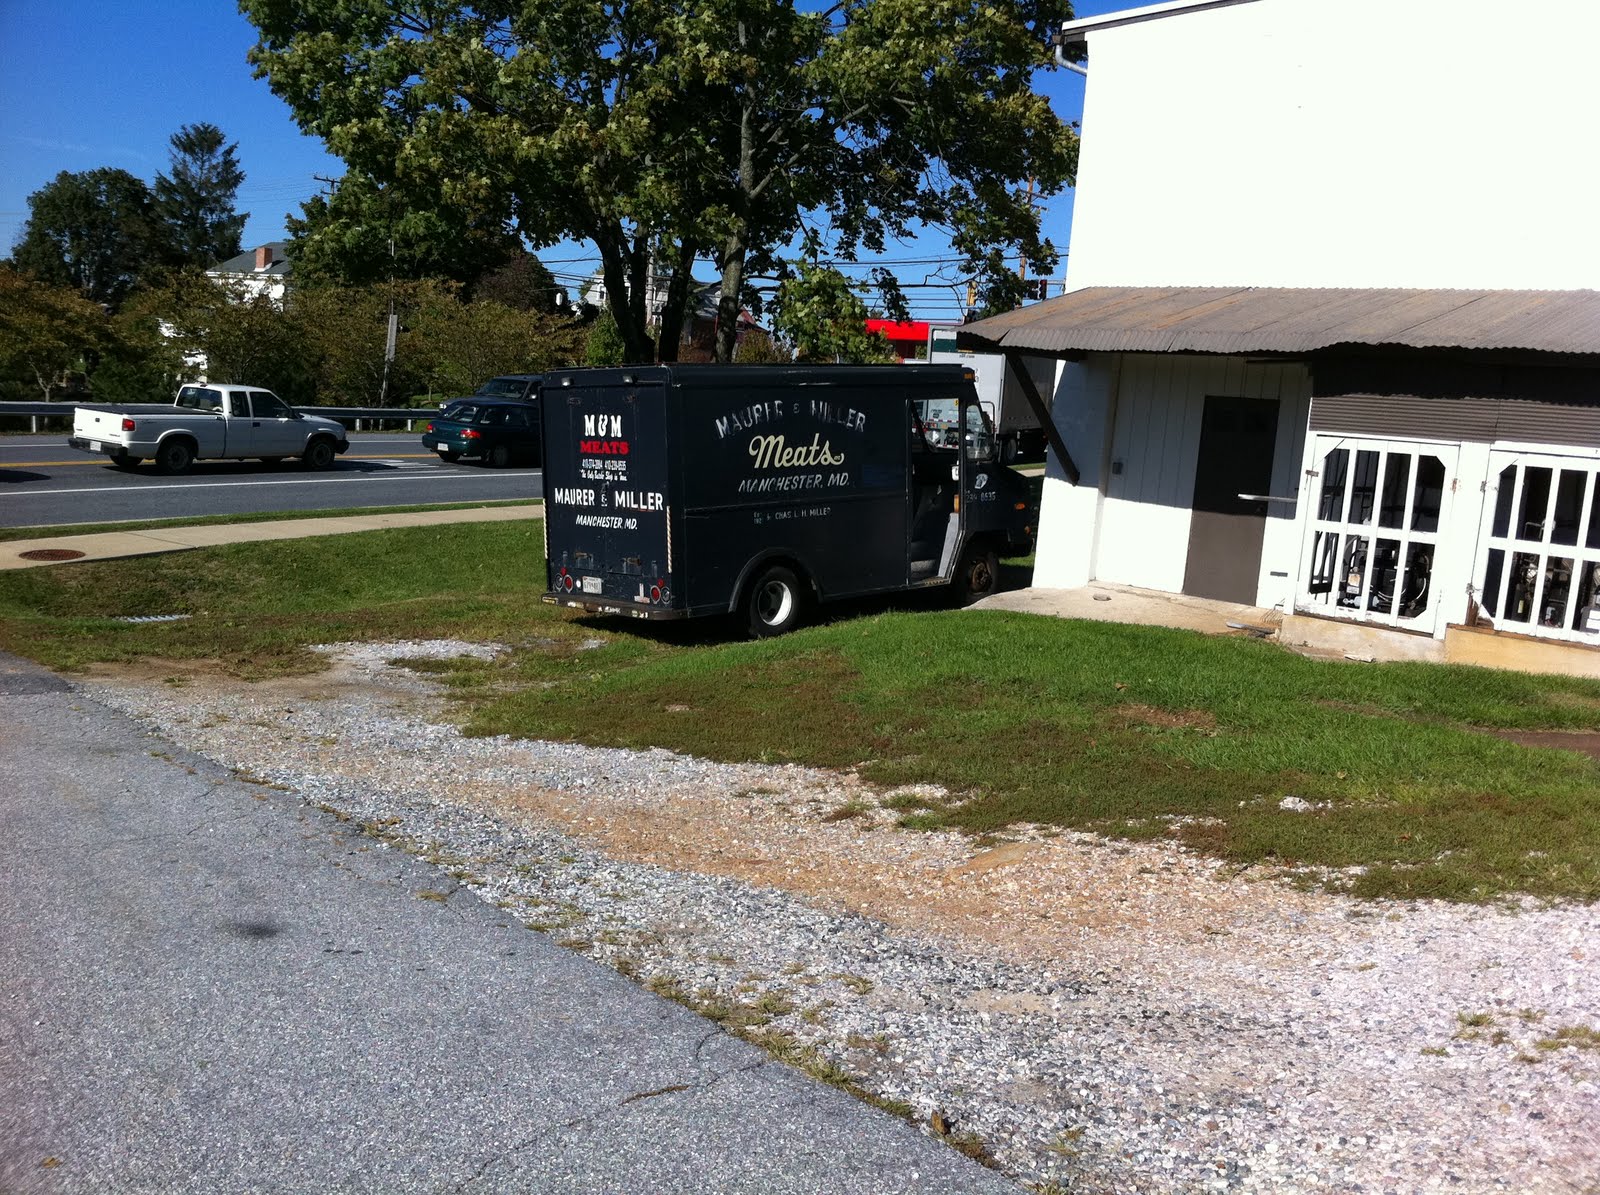
A Truth: pig roasts require pigs. One has surprisingly many options when buying a whole pig, but most of them are ridiculously expensive. Maurer and Miller came highly recommended to us from a few people (thanks Aunt Deb and Libby!), and a quick phone call secured us a 125 lb pig at $1.69/lb. Another phone call changed this to a 150 lb pig at $1.49/lb - what a steal! Still another phone call, this received the morning we were to pick up a pig, changed this yet again to a 200 lb pig at $1.29/lb. My thrifty heart was singing.
A 200 lb pig is large. Quite large. Although I insist I can cram enormous boxes and such into my car (even two bookshelves from Ikea!), shoving a giant pig into the backseat seemed like a mistake. Asking a few butchers to shove the giant pig into the backseat seemed like an even worse idea. Luckily, Lex came to the rescue with Bronco and we drove up to M&M the day before the party to pick the pig up.
Our beastie was brought out for a little additional butchering before they wrapped her up for us. We asked that it be butterflied, and mumsy requested the head be removed. This seemed reasonable as 1) the head cooks at a far different pace than the rest of the carcass unless you split it open which is 2) simply not comfortable for most of the attendees.

I believe this is Steve taking care of our pig for us. The hacksaw was used to open it up the sternum...
 ...then the biggest cleaver I have ever seen made an appearance. Steve (?) kindly cut the ribs away from the spine so we could take the pig apart more easily later.
A note about M&M: these guys are freaking amazing. Although they initially appeared more amused by us (and perhaps scandalized by Lex's filthy mouth and "End Don't Ask Don't Tell" t-shirt), they quickly warmed up to us after realizing carcasses don't make us faint. We quickly secured ourselves a tour of the place, including processing room number one, wherein a cow was being broken down. One of the guys was digging around in the pile of miscellaneous cow parts in the corner, and brought us the little treat Lex is peeking through below. That, gentle reader, would be the lens of a cow eye. Even more fun, like any other lens, if you look through it everything is inverted.

In addition to looking through a cow lens (which frankly is much smaller than I thought it'd be), the next few stops on our tour took us to a meat locker, a kidney prepping station, and a giant lard bin. At this point, we expressed our gratitude, but didn't want to keep Steve (?) waiting with our pig and began to make our way out. Another guy, however, told us we hadn't seen it all yet, and opened yet another cold room for us to peek in. Here, there were many cured meats, as well as something like six trays of cow tongues, complete with the massive musculature that attaches them to the mouth and lets them swing around like (E, a little help please) a crazy monkey. We were asked to first, well, pet the cow tongue in one direction -- oh so smooth -- and then in the other -- sandpapery like a cat's tongue. This, according to our butcher/tour guide enables them to pick up quite a lot of water and grain using their tongues as textured scoops. (Now that I am thinking about it, I have just examined my tongue but as it's covered in saliva it's impossible to draw a conclusion. I don't think our papillae are slanted one way or the other, but I will have to look again later.)
We said our thanks, then paid a quick visit to yet another meat locker - this one full of beef sides and a lamb or two.

After about an hour hanging out with the butchers, we finally loaded up the pig and went along our merry way.
Loading the pig was very easy: two of the guys threw it in the truck for us. Unloading it was not so easy. When we were getting a smaller pig the plan was to toss it in the bathtub with some ice and forget about it until morning. This beast, however, was not going to fit, and was too heavy to bother trying. Paw, genius that he is, suggested tossing her in the bucket of his tractor. Eventually we dragged beastie out of Bronco, stuffed her full of ice, and Paw parked her about 10 feet up in the air where hopefully no one would eat her before we were ready.


To spare mumsy's garden the indignity of being peed upon all night, we went the classy route.
 And here, mumsy spreads her creative toilet-decorating wings:
 Spirit of the law: using a pink soda can to flag rebar hanging out the back of Bronco.
 Piggy girl was placed on a bed of rebar, then rather unceremoniously dragged (super heavy and hot hot!) on top of the fire Paw and E had prepared. There, after a brief pig-on-fire moment, she stayed about 10 or 11 hours. Paw and E's oven was so masterfully prepared, and amazingly insulated, we only went through about three bags of charcoal - if even that - and now have oh, let's guess, 60 pounds of charcoal in the basement. Oy, leftovers. More about leftovers later.
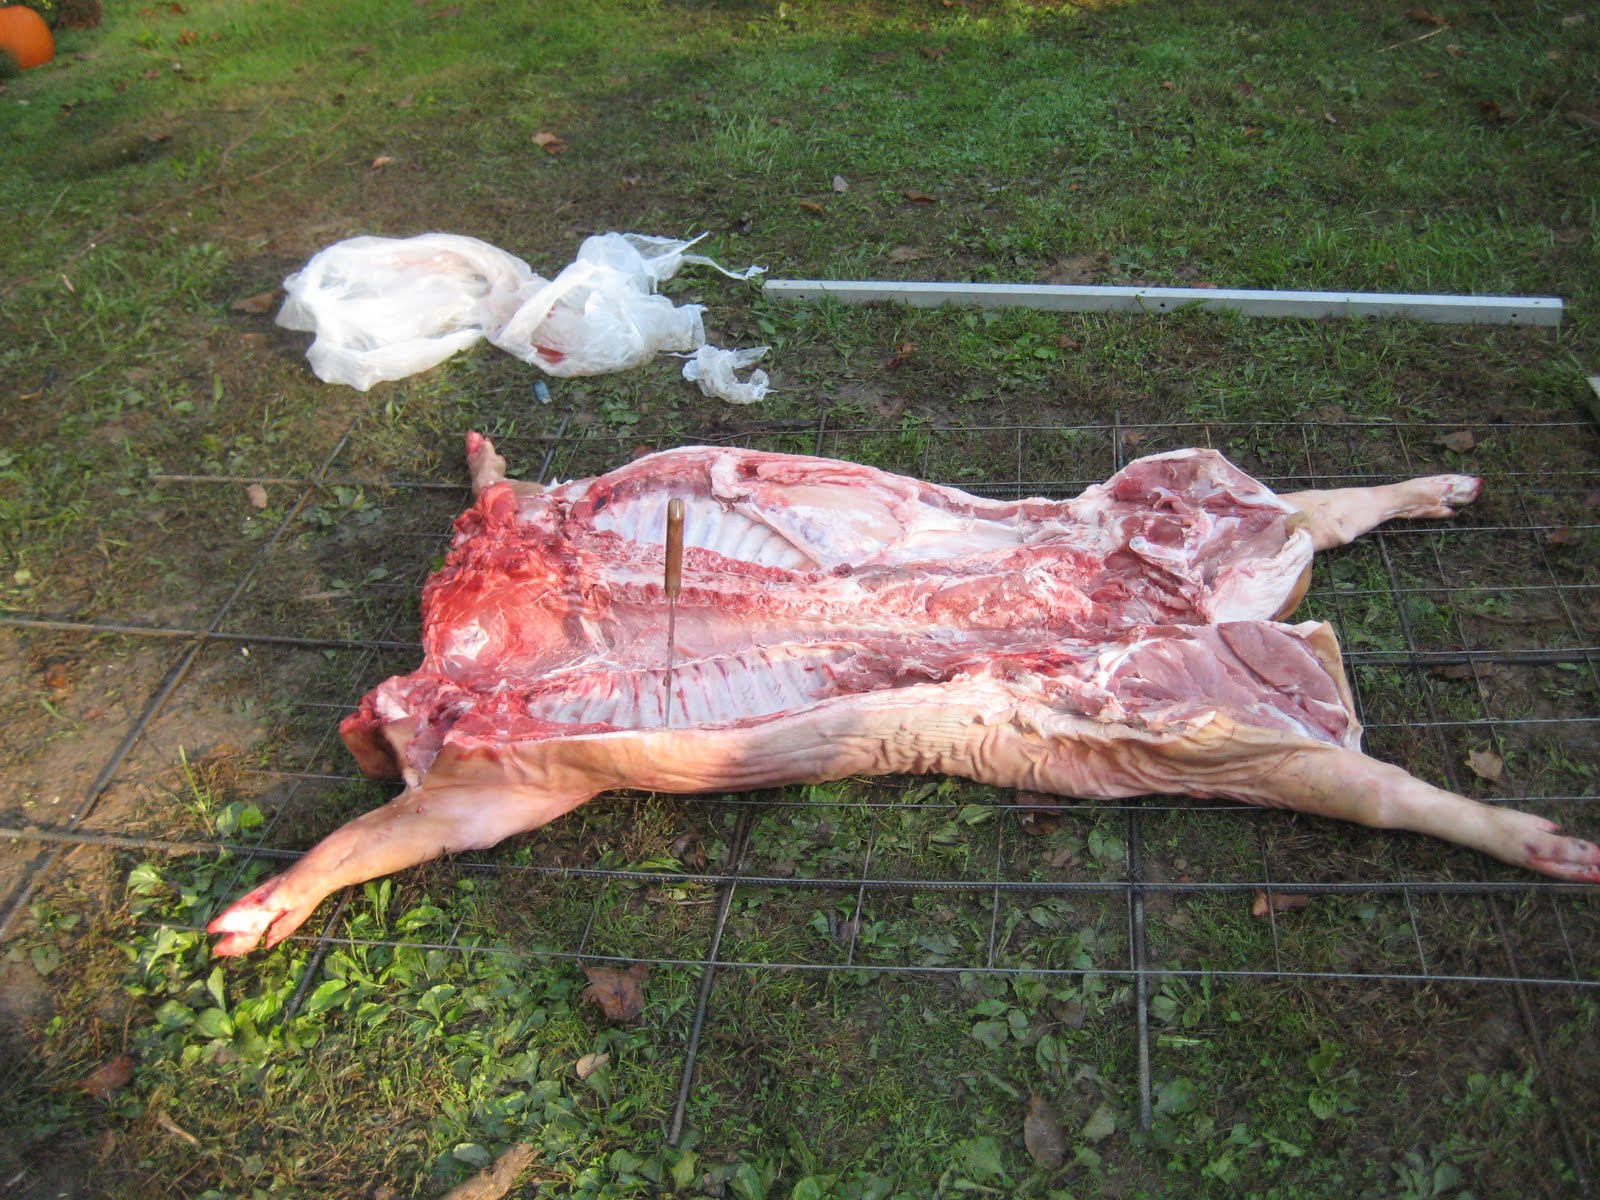


 And then, 10 or so hours later, the pig (or parts thereof) was (were) done.


 We have, I think, about 50 lb. of pork leftover. Somehow, though, we went through about 30 lb. of pit beef that E cooked (deeelicious!), so perhaps we could have gone through a 200 lb. pig after all. Holy smokes.
A million thanks to Paw for an enormous amount of help building the oven, cooking the pig, and hacking her up into small bite-size pieces. Thank you, thank you, thank you! Many thanks to mumsy and Lex for help getting everything together, and to Uncle Jay for help carving the pig. Thanks to Marci and Joey for the pics I have stolen from you and for your enormous cleaning effort the next morning.
Next time, perhaps a smaller animal, but thanks again to everyone for playing along!


